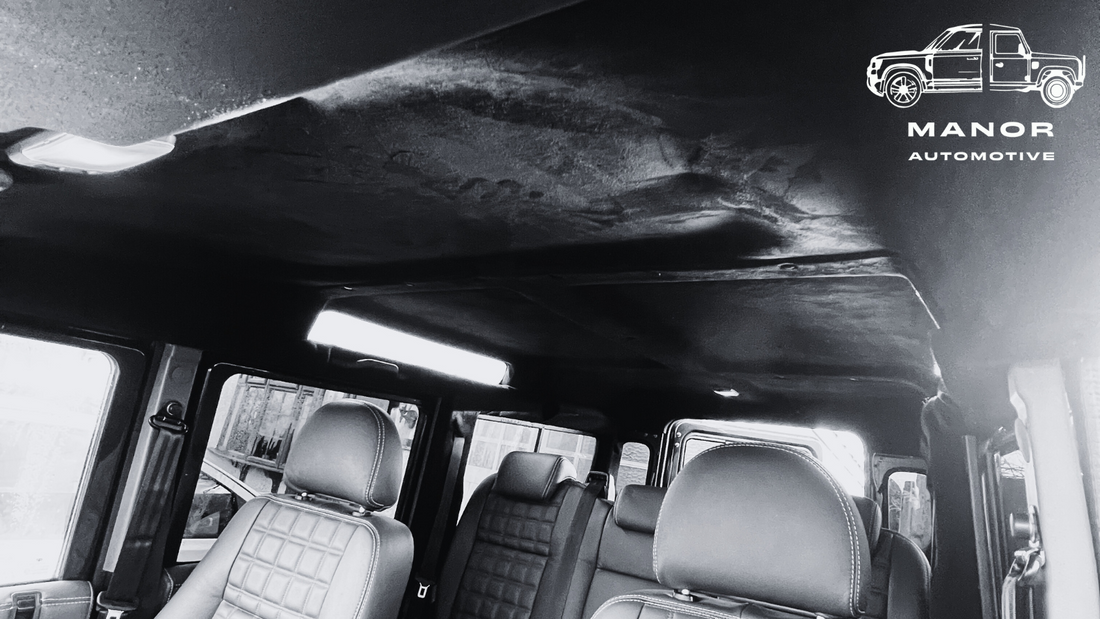
Upgrading the interior of your classic Land Rover Defender can significantly enhance both comfort and aesthetics. One of the most effective ways to give your Defender’s interior a fresh, modern look is by installing a new headlining. Our Black Suede Headlining (also available for 90 models) offers a premium upgrade with a sleek, luxurious finish.
In this blog, we’ll explore the benefits of upgrading your Defender’s headlining and provide a step-by-step guide to help you install it.


Why Upgrade Your Defender’s Headlining?
The original headlining in many older Defenders is often prone to sagging, discoloration, and wear over time. If you’ve noticed that your Defender’s interior is looking a little tired or dated, replacing the headlining can breathe new life into the cabin.
The headlining is crafted from high-quality GRP (glass reinforced plastic) and then covered in our Technosuede fabric, a material known for its durability, luxurious feel, and easy-to-clean properties. The black finish gives your Defender a refined, modern look that enhances the overall driving experience. Additionally, this upgrade can improve sound insulation, making your Defender quieter on the road.
Key Benefits of the Defender 110 Full Head Lining:
- Luxury Feel: The techno suede material provides a soft, high-end touch that adds a premium feel to your Defender’s interior.
- Improved Sound Insulation: The upgraded headlining importantly helps reduce road noise, creating a more comfortable driving environment.
- Sleek Black Finish: The modern black color enhances the look of your interior, giving it a more contemporary style.
- Durability: Designed to withstand the rigors of daily use, this headlining offers long-lasting quality.
How to Install Your New Headlining
While installing a new headlining might seem like a daunting task, with the right tools and patience, it’s a manageable DIY project for any Defender owner. Here’s a step-by-step guide to help you install the headlining:
Tools and Materials You’ll Need:
- Phillips screwdriver
- Flathead screwdriver
- Trim removal tool
- Stanley knife or scissors
- Masking tape (optional)
- Hammer (for reinserting clips)
Step 1: Remove the Existing Headlining Before installing the new headlining, you’ll need to remove the old one. Start by removing any trim pieces around the edges of the roof, door seals will need to be pulled down at the top. grab handles , sun visors, and interior light fixtures also. Use a Phillips screwdriver and a trim removal tool to carefully detach these components. Once the trim is removed, gently pull down the old headlining, taking care not to damage any underlying components. If the adhesive is stubborn, you can use a flathead screwdriver to help loosen it.
Step 2: Prepare the Surface With the old headlining removed, clean the surface of the roof to ensure a smooth base for the new head lining, Remove any leftover adhesive, dirt, or debris. This step is crucial for ensuring the new headlining fits correctly.
Step 3: Position the New Headlining Lay the headlining upto the roof of your vehicle, aligning it with the edges and cutouts for interior fixtures. This product is pre-cut to fit the Defender 110 perfectly, making installation easier. Use masking tape to hold the headlining in place temporarily as you work if required.
Step 4: Reinstall Trim and Fixtures After the headlining is securely in place, it’s time to reattach the trim pieces, sun visors, and interior light fixtures. Use the screws you removed earlier to secure everything back into its original position. New fir tree clips are provided Ensure that all components are aligned and securely fastened.
Step 5: Final Touches Once everything is reinstalled, check for any remaining wrinkles or loose spots in the headlining. Use a Stanley knife or scissors to trim any excess material if necessary. Your new headlining should now look smooth, clean, and perfectly fitted to your Defender’s roof.

Conclusion
Upgrading your Defender’s headlining with the new Manor headlining is a fantastic way to improve the look and feel of your vehicle’s interior. Not only does this upgrade provide a luxurious, modern touch, but it also enhances sound insulation and adds long-lasting durability.
With the right tools and patience, you can complete this installation yourself, transforming your Defender’s interior into a more comfortable and stylish space. Explore this and other Defender upgrades at Manor Automotive today.